

About a year ago, I decided that I had too many ladder back chairs
in my shop, Dwellings.

Most needed work and because I have an affinity for old chairs,
they kept multiplying.
One day I decided to try my hand at weaving a seat, but I began with
a small stool.

Before: Poor thing

After: My first attempt
It wasn't great, but when one of our favorite customers purchased it, that inspired me, and I began the journey of fabric weaving not having a clue what I was doing!

Things didn't get much better.
I couldn't decide whether to paint the chairs or leave them chippy.
I couldn't decide whether to paint the chairs or leave them chippy.
So I did a little of each.

I was weaving like we used to weave pot holders. I was not weaving both top and bottom and I knew there had to be a way to make the weaving prettier. I began to search the Internet and found one short blog entry that gave some tips.
Now I weave top and bottom and have reduced my weaving time from 4 hours to about 2 1/2 hours.
I do sell these chairs in my shop and I will give you a break down on costs.
It costs more to do these than it would first appear.
In the two pictures above, I used fabric I had on hand, but it
is much more fun to color coordinate pretty fabrics.
Please, read all the way through before beginning.
Let's get started!
1. Chairs ($10)
Chairs need to have the seat removed. They must have rounded dowels on four sides to do what I do.
Dowels need to be in place and sturdy. I use old metal tin snips to remove the seat. I repair or glue and clamp any areas that need it at this point. I have a rule...I do NOT pay over $10 for a chair.

This chair above is in the seat removal process.
You will be amazed at how dirty this process is. Be prepared.

(Apology: new computer..can't figure out all the rotate features. lol)
This chair is ready for weaving...it was painted with Annie Sloan Old White.
NOTICE: The back and front dowels are lower than the side ones.
This is important to notice. More in a minute about this.
2. Paint ($5-8)
I would rather take a beating than paint a chair! So I don't take lightly the decision to hand paint or spray. If I spray I use Rust-Oleum Ultra Cover 2X Coverage...it's about $3.76 per can and I use a can and a half per chair. (About $8 for spray and about $5-6 for hand painting.) I DO love all the pretty new colors you can get today and most of my chairs are bright and inviting. People LOVE turquoise, red and hot pink. I personally LOVE black.

As you can see, I have improved my technique since those first attempts!
Love these colors and fabrics.

I love this small chair. I didn't paint it.
It was painted brown and I left it alone.

This was my grandmother's maple ladder back.
I love the way it turned out! I used one fabric.
3. Fabric ($10-20 per seat)
Ahhh...fabric. Did I mention that I LOVE fabric in addition to chairs...and china...and Majolica...never mind. Fabric color and type is your choice. Let me give you some pointers that I have found helpful. First, once the fabric is woven, the pattern pretty much goes away. The colors remain, but the cute chicken on the fabric is gone. Remember this when selecting fabric. Go for color and smaller patterns. 100% cotton quilting fabric is nice but pricey...$9.99 yd. If you get it 40% off it's not so high. Cotton and poly blend is OK, too. Burlap, canvas, denim...not so much. They are hard to handle but it can be done. (Just hope you don't mind the ruined manicure and a few blisters.) If you want to wash your fabric, go ahead. Your choice also.
How much to buy? I will explain why below, but let's say 3 1/2 to 4 1/2 yards of 45" wide fabric per chair.
4. Fabric prep
I take a color sample (spray can top) with me to the fabric store.

Excuse the sack...I was so excited about my paint, I forgot to move it.
Depending on the design, you will pick one, two or more fabrics for your seat.
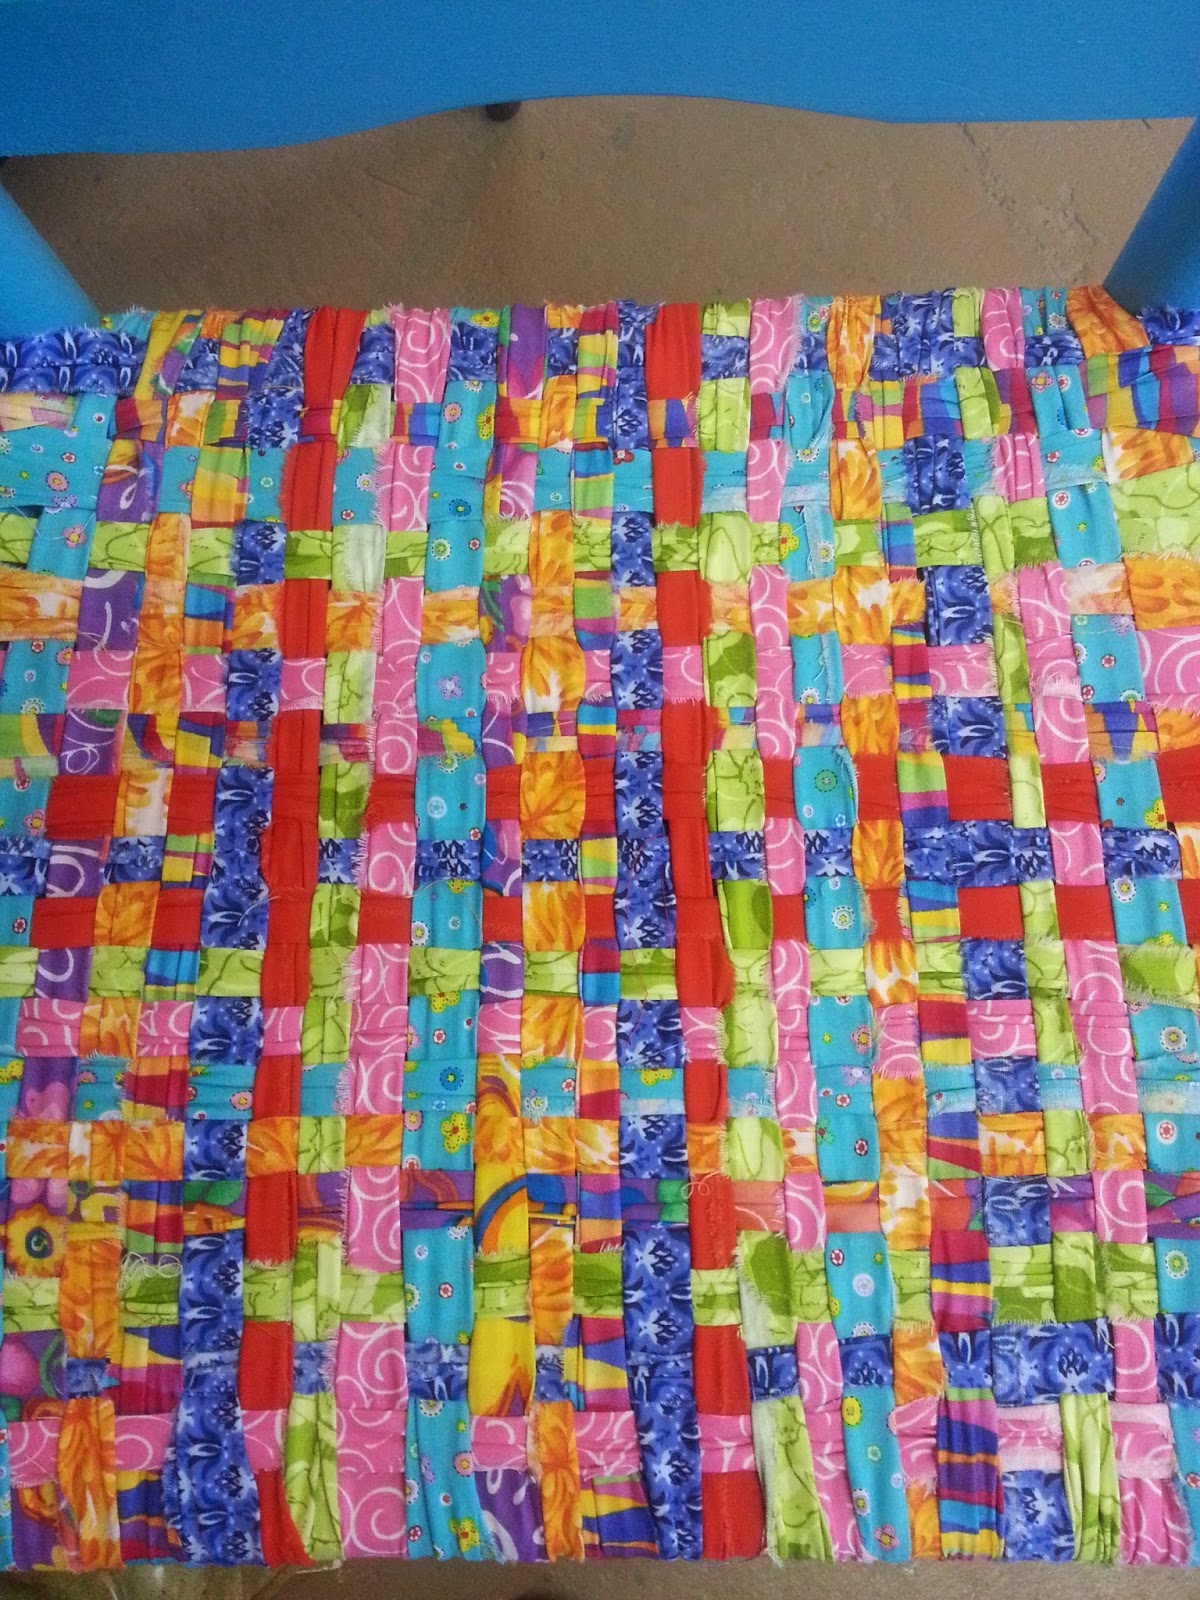
This seat uses several colors...but a purposed repeat.
Strips are folded and scrunched.
Strips are folded and scrunched.

One fabric...random weaving.

Two fabrics...checkerboard effect.
Strips are not folded but are scrunched.
Some fraying shows.
Strips are not folded but are scrunched.
Some fraying shows.
The world is your oyster. Do whatever you like!
How to prepare the fabric for weaving is my own little way. You do it as you wish. Some people like to fold their strips. Some iron them (ugh) and some sew the strips. Me? I scrunch mine. So these directions are for scrunching.

Pick out your 45" wide fabric. Approximately 20-23 strips will be needed horizontally and 20-23 strips will be needed vertically. If I have 5 fabrics, and I am using (23+23=) 46 strips divided by
5 fabrics=approx. 9 strips of each color.

Keep strips separate or you will have one big mess.
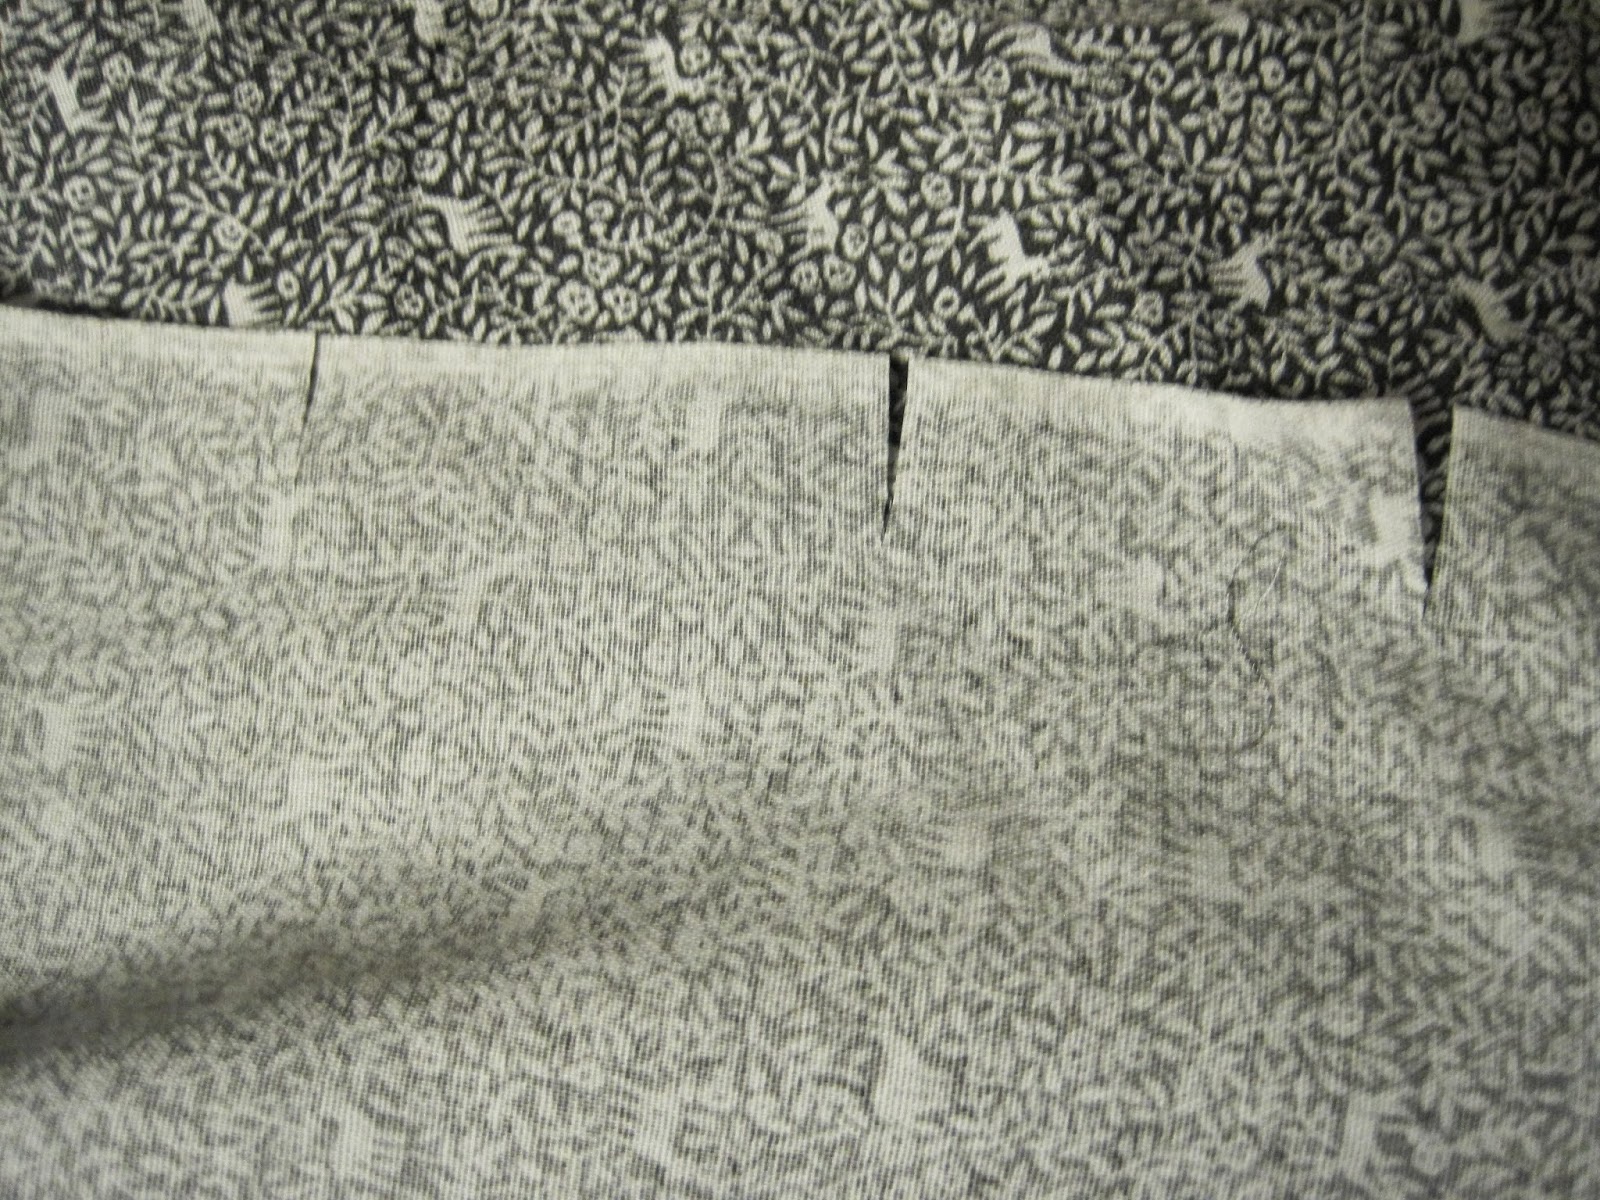
Some people cut their fabric. I tear. Make the number of cuts you will need on the selvage (woven) edge. I make mine about 1 1/2 " each. Then tear. You will be tearing horizontally and your strips will be more even than if you cut. You will have to deal with strings...but oh, well. Your first tear will not be even because you are having to make up for the people in the fabric store who CUT your fabric unevenly. This is where good fabric is important. Knit, canvas, denim and the like are not suited to tear, you would have to cut them. Burlap....I won't even go there, but it would look cute.

Notice the frays on the edges. I like that. You, on the other hand, may not.
You have got to commit to folding, ironing or scrunching.

Now, working from front to back or side to side...your choice..(I use the lower dowels first, but remember, I am self-taught, so I don't really know what I am doing!)
Tauntly tie one of your strips in a double knot around two dowels. Trim the knot tails to 1'. Then rotate that knot to the underneath side. Have the knot somewhere in the middle not too far forward or backward. You will tuck those knots in to hide as you progress.

As you continue tying, "scrunch" the strips together. Be
careful that you do not cover one strip with another..just scrunch enough to make room for the next one. This will make your strips into a tight weave.

I used 23 strips here. What if I used 24? I could have used 30...it's your choice!!
Knots are underneath. They will be hidden.
Be prepared for the next pic....haha.

I destroyed this evidence of my incompetence awhile back.
My first attempt at weaving...and not hiding knots!!
Yes, only special people get to see this hot mess.
Moving along...
Once all the strips going one way are tied and double knotted and rotated to the underneath side, it will be time to weave in the opposite direction.
Begin your first strip in the middle and only pick up the top half of the strip and weave over and under.

As you weave, scrunch one strip into the other to tighten.
This isn't scrunched enough...the strips need to be more even..
keep fooling with it until it looks neatly done.

There will be approximately 8 inch tails left on both sides after you weave the top.
Holding on to both tails...pull to make the fabric taunt. Flip the chair over and on the underneath side begin weaving. Weave both tails (one at a time) until they meet in the middle. Tie and double knot. Cut the tail to about 1inch. Hide the knot in between strips. (Easier said than done!) Some knots will show but at least hide the 1" tails.

Above is the underneath side of a finished chair.
Knots are pretty much hidden.
I use a little dab of Elmer's Glue All
or fabric glue could be used to make sure the knots are secure.
That's pretty much it!
Here are a few more pictures that might give you some ideas.


Child's rocking chair

I can't remember how I did the gray one.

Red is a great color!

Doll Chairs and doll bed above..


Photography props!

Whatever you choose to do with this info is up to you.
You might be like the lady who came back and handed me
$50 and said, "Never mind, it was too hard. I will just buy one!"
We invite you to LIKE our Facebook page, Dwellings.
Our profile pic is an orange Pyrex bowl.
Our physical address is 3955 highway 49 south in Florence, Mississippi
Our hours: Wednesday-Saturday 10-5
I also invite you to FOLLOW my blog:
Blessings,
Angela McInnis


